Create or edit a custom profile
You can create and manage custom profiles in the KACE Cloud Library.
To create or edit a custom profile:
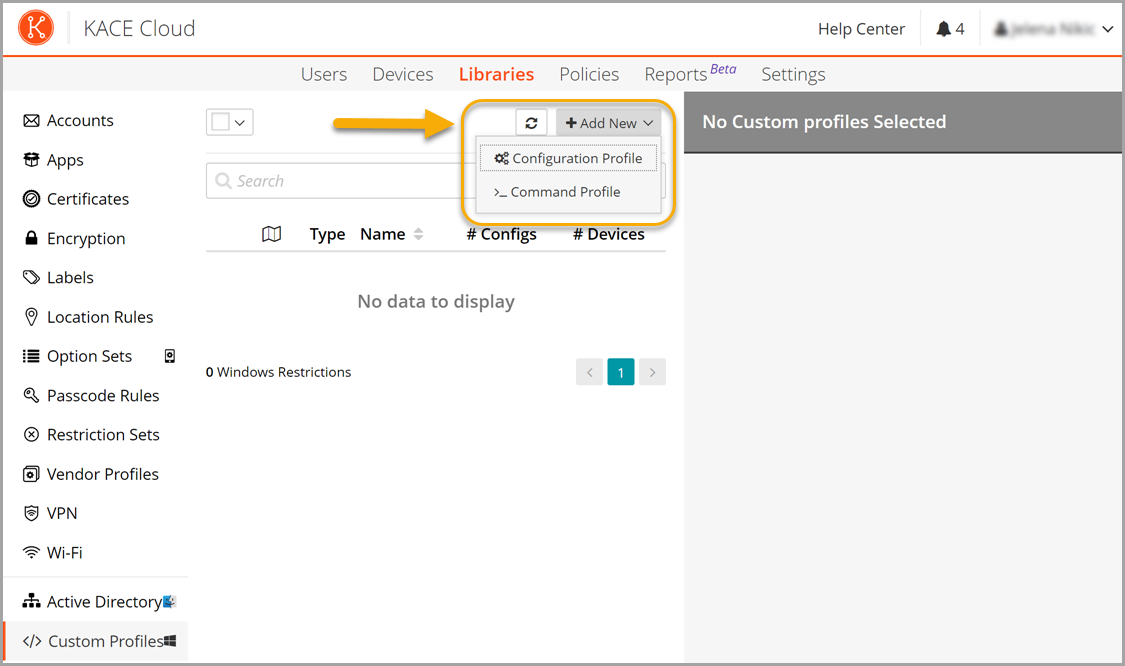
- Select the Libraries tab in top navigation.
- Click the Custom Profiles icon.
- Complete one of the following steps:
- To create a new custom profile, click Add New and select one of the following options, as applicable:
- Configuration Profile: A Configuration Profile is used to configure settings on a device. It can be linked to a policy, which means that (where supported by Windows) KACE Cloud ensures that the value remains in the correct state on the device, otherwise the device is marked as being out-of-compliance. Not all configurations can be queried to ensure enforcement. When you link a configuration profile to a policy or directly to a device, it can be removed later, as needed. Only the Add/Replace and Replace Only operations are supported in this profile type. If your CSPs require the Execute operation, you must use a Command Profile.
- Command Profile: A Command Profile is a run-once profile which makes a change to a device or runs a command on a device but does not get linked to the device or policy. For example, scheduling a reboot or adding an account to the device are good examples of command profiles. The operation for included CSPs can be set to Add/Replace, Replace Only, Execute, or Delete.
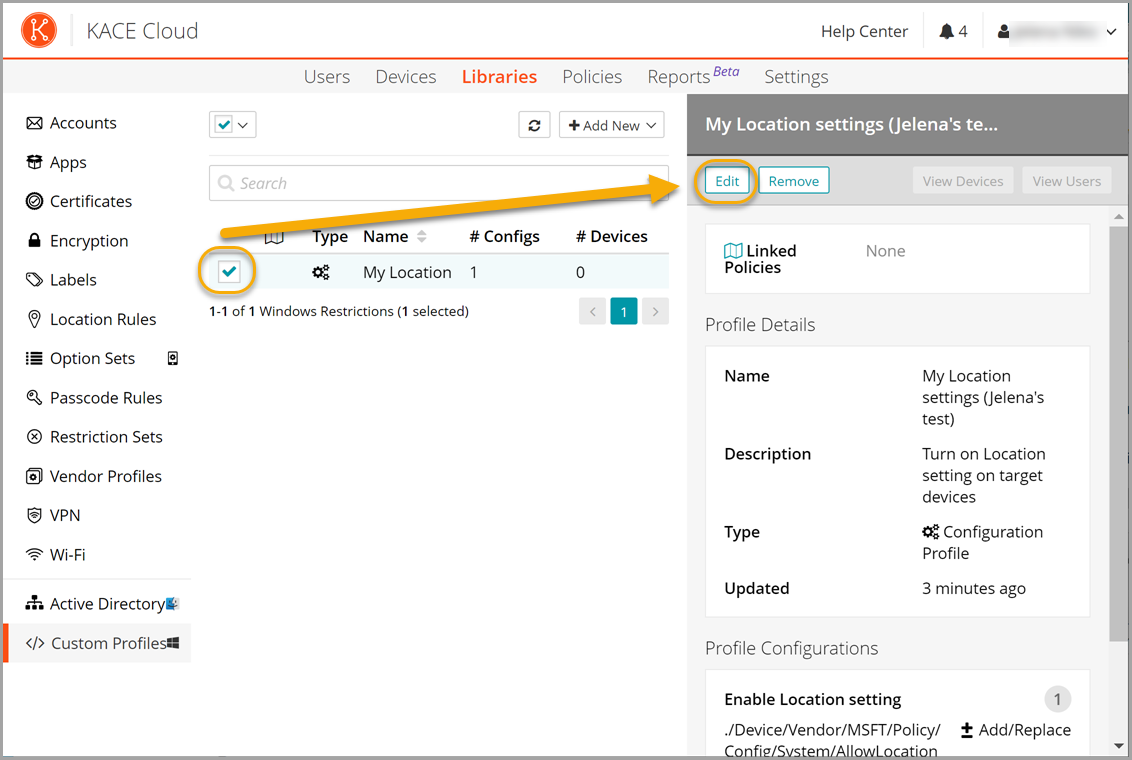
- To edit an existing custom profile, select it in the list, and in the right pane click Edit.
- To create a new custom profile, click Add New and select one of the following options, as applicable:
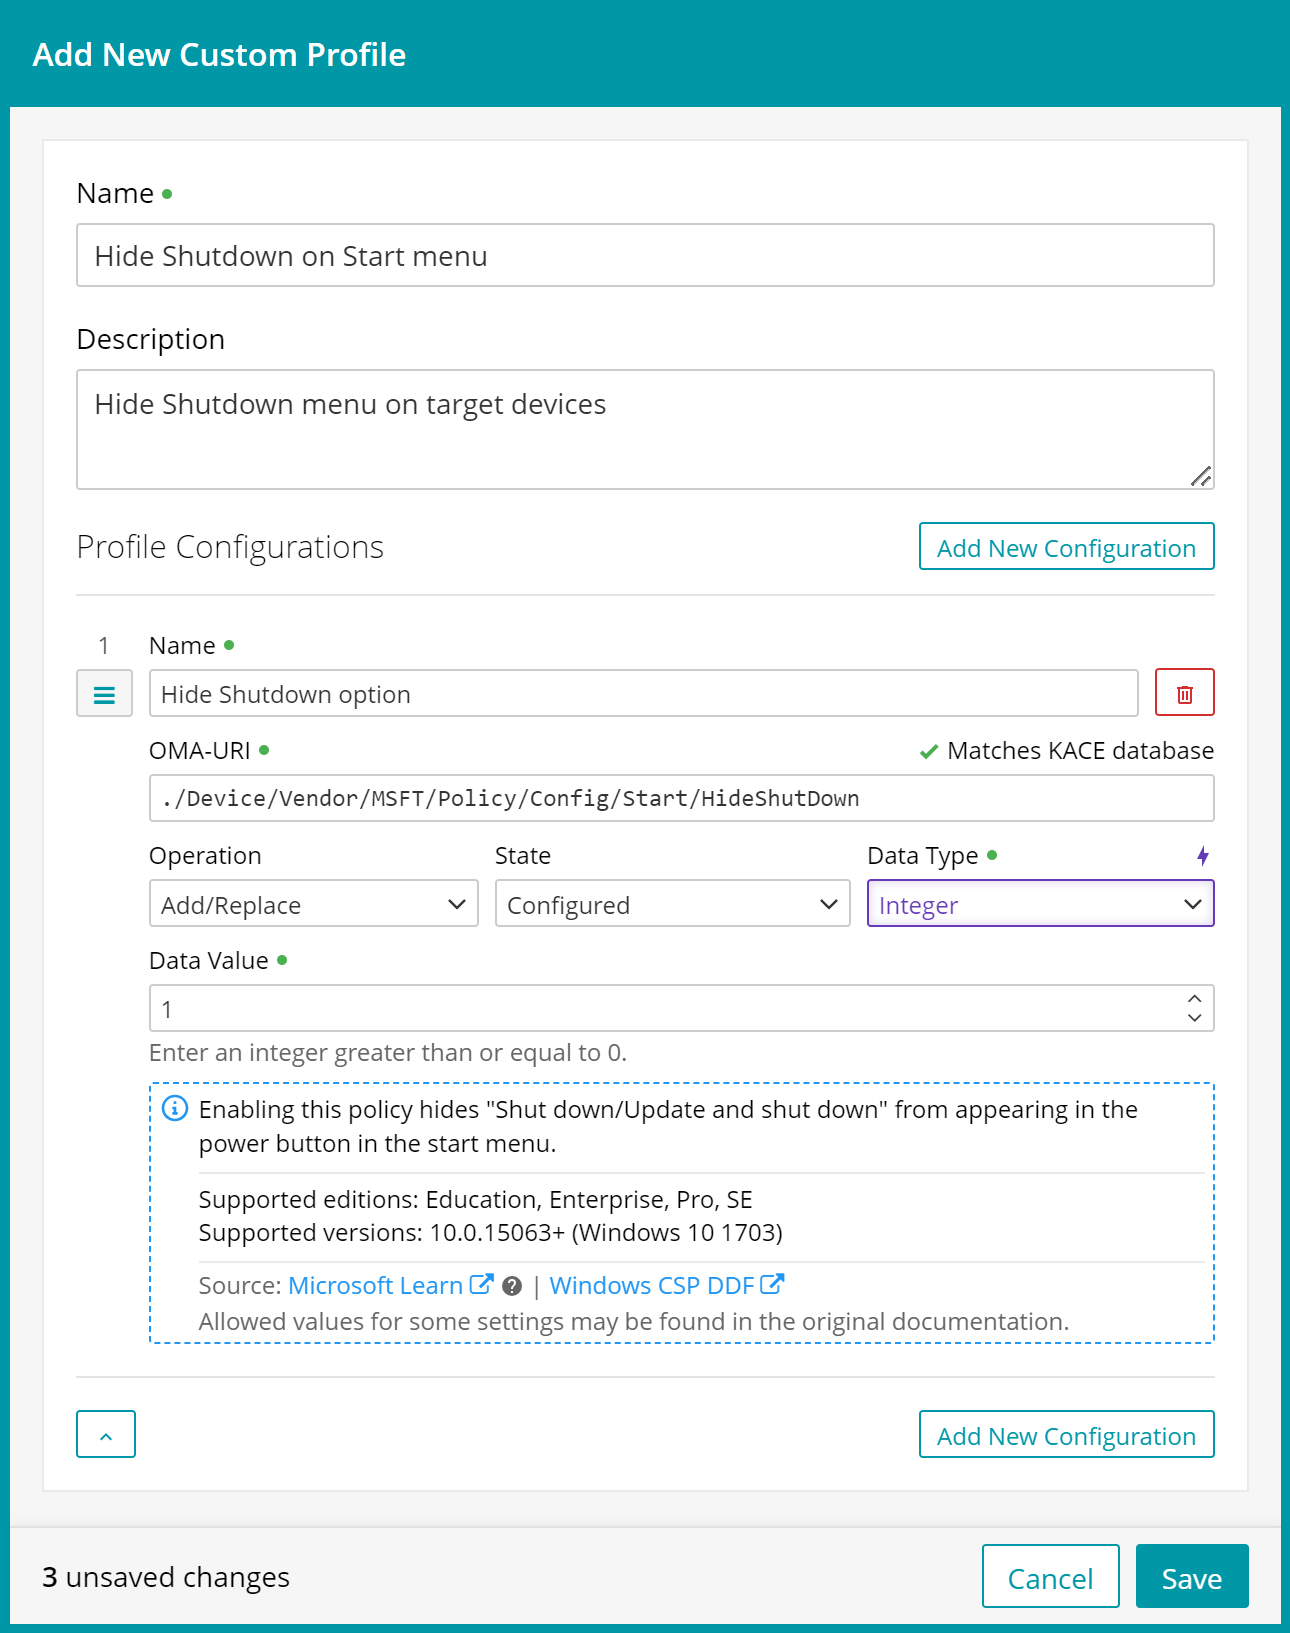
- In the Custom Profile view that appears on the right, specify the following settings:
- Provide the Name and Description of your configuration profile.
- Click Add New Configuration. A profile can have multiple steps in it. You can create a new configuration for each step in your custom profile.
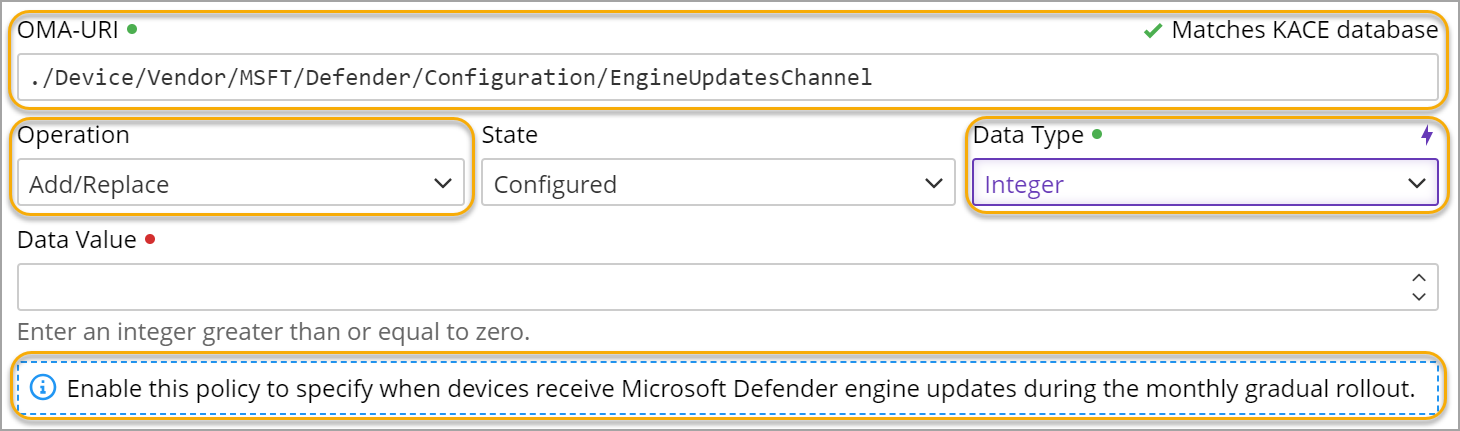
- In the section that appears, specify the applicable settings. Each configuration step that you want to create must include a URI that references the applicable Windows policy, and the data that you want to assign to it.
Start by configuring the path to the Windows policy. Use the OMA-URI field to specify the path, and the remaining fields to populate the policy data. If you know the exact path you can type it into the OMA-URI field. You can also use any of the following ways to specify the path:
- Auto-completion: Use this feature to show the available segments for each level in the path. For example, click this field, and select ./Device. Then, click the field again, choose …Device/Vendor from the list, and so on.

The Operation and Data Type fields are populated automatically as you make your selection. Also, if the documentation about the selected URI is available, it appears at the bottom of the configuration step.
- Search: Type a desired term into the OMA-URI field and select the applicable path.

Next, select an entry from the list and always use a URI in the correct format. The path must begin with a period '.' and use forward slashes '/' as separators. Path segments must not contain spaces. Letters, numbers, and some special characters (braces, underscores, hyphens) are allowed.
You can also search for a specific element as you assemble the URI. For example:
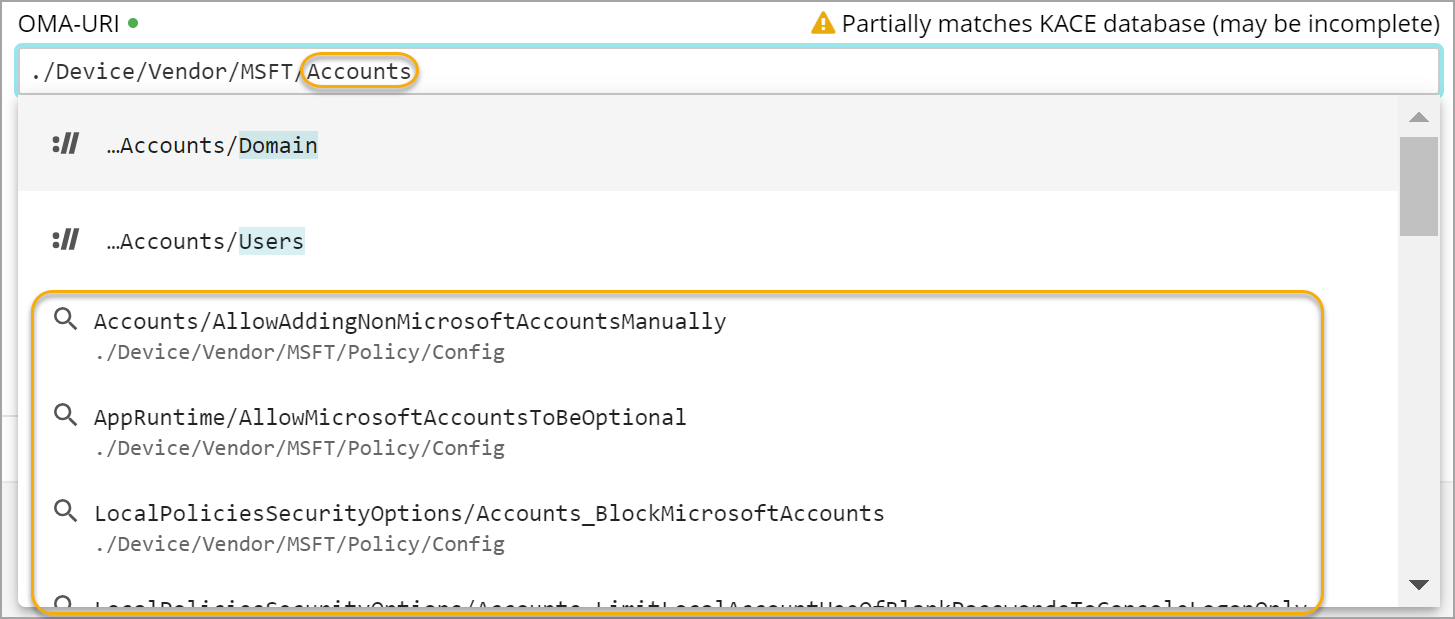
In case there are too many search results it is better to provide a more specific search filter to navigate to the desired part of the tree.
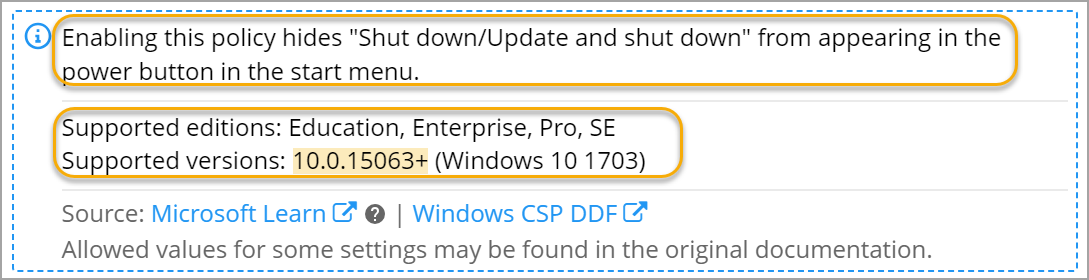
- Documentation: The description of the selected command appears at the bottom of the view, allowing you to better understand the action associated with the selected element. The supported Windows edition and version is also displayed. In some cases a specific Windows patch level may be required for a selected element. This is also indicated in the documentation section, when applicable.
A complete URI can look like this: ./Device/Vendor/MSFT/Defender/Configuration/EngineUpdatesChannel.
To construct a valid URI, follow the Microsoft documentation on Configuration Service Providers. See Custom profile examples for hands-on instructions in some common use-case scenarios.
- Auto-completion: Use this feature to show the available segments for each level in the path. For example, click this field, and select ./Device. Then, click the field again, choose …Device/Vendor from the list, and so on.
- Add additional configuration steps, as needed.
- When done, click Save.